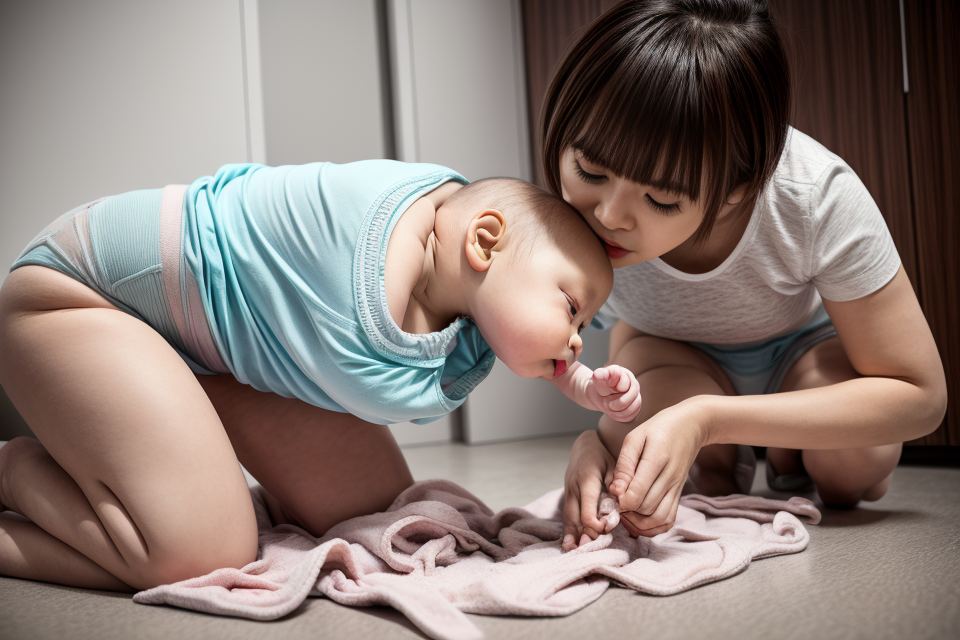
As a parent, one of the most important tasks you will face is changing your baby’s diaper. Not only is it a necessary part of keeping your baby clean and healthy, but it can also be a daunting task, especially for new parents. But fear not! With a little bit of know-how and some simple tips and tricks, you can become a diaper-changing pro in no time. In this guide, we will explore the ins and outs of effective diaper changes, from preparing for the task to making it as smooth and stress-free as possible. So, let’s get started and learn how to become a diaper-changing superhero!
Understanding the Importance of Effective Diaper Changes
The Benefits of Clean Diapers
- Preventing Diaper Rash
Diaper rash is a common issue that can cause discomfort and irritation for babies. Clean diapers can help prevent the rash from developing by keeping the skin dry and free from waste products that can cause irritation. It is important to check the diaper area regularly and clean it thoroughly when needed to prevent diaper rash. - Promoting Healthy Skin
Clean diapers can also promote healthy skin by removing dirt, sweat, and other substances that can clog pores and cause breakouts. Keeping the skin clean and dry can help prevent rashes and other skin conditions, such as eczema and psoriasis. - Ensuring Odor Control
Diapers can also produce unpleasant odors over time, especially if they are not changed frequently. Clean diapers can help control odors by removing waste products and reducing the amount of bacteria that can cause unpleasant smells. It is important to dispose of dirty diapers properly and to clean the diaper area thoroughly after each change to prevent odor buildup.
The Risks of Inadequate Diaper Changes
- Infections and Skin Irritation
- Prolonged exposure to urine and feces can cause irritation and inflammation of the skin, leading to redness, rashes, and even infections.
- Infants who experience frequent diaper rash are more susceptible to developing other skin infections, such as yeast infections.
- Discomfort and Crankiness
- Diapers that are too tight or too loose can cause discomfort and irritation for babies, leading to excessive crying and fussiness.
- Infants who are not comfortable may have difficulty sleeping, eating, and developing a healthy attachment to their caregivers.
- Diaper Leaks and Messes
- Inadequate diaper changes can result in leaks and messes, which can be frustrating for both caregivers and infants.
- Leaks can also lead to skin irritation and infections, as well as create a messy and unpleasant environment for both the baby and the caregiver.
Diaper Changing Essentials
What You’ll Need for a Successful Diaper Change
When it comes to diaper changes, having the right tools and supplies can make the process much easier and efficient. Here’s a list of essentials you’ll need for a successful diaper change:
Clean Diapers
It’s important to always have a fresh, clean diaper on hand. The dirty diaper should be disposed of properly and a new, clean diaper should be put on the baby as soon as possible. This will help prevent diaper rash and keep the baby comfortable.
Baby Wipes
Baby wipes are an essential part of the diaper changing process. They are designed to be gentle on the baby’s skin and can be used to clean up any messes that may have occurred during the diaper change.
Disposable Diaper Bags
Diaper bags are a must-have for any parent. They are convenient for carrying dirty diapers and wipes, and can be disposed of after use.
Hand Sanitizer
Hand sanitizer is an important tool for parents when it comes to diaper changes. It helps to prevent the spread of germs and keep the baby clean.
Diaper Rash Cream
Diaper rash is a common issue for babies, and applying diaper rash cream can help to prevent and treat it. It’s important to have a tube of diaper rash cream on hand and to apply it after each diaper change.
How to Set Up a Diaper Changing Station
Choosing the Right Location
When setting up a diaper changing station, the first thing to consider is the location. Ideally, the station should be set up in a quiet, private area where the baby can be changed without distractions or interruptions. Some suitable locations include:
- A designated nursery or changing area in the home
- A private corner of a room
- A portable changing station that can be moved to different locations as needed
Preparing the Area
Once the location has been chosen, the next step is to prepare the area for the diaper changing station. This involves setting up the necessary equipment and supplies, such as:
- A changing table or surface
- A stack of clean diapers and wipes
- A trash can or bin for disposing of used diapers
- A hand sanitizer or soap and water for cleaning hands
- A rash cream or other soothing ointments
Organizing Essential Items
To make the diaper changing process as efficient and stress-free as possible, it’s important to organize the essential items in a way that is easy to access and use. Consider storing items in labeled containers or bins, and keeping extra supplies on hand for emergencies or when changing multiple diapers in quick succession. Additionally, make sure that all items are within reach and easy to grab when needed, to avoid any delays or disruptions during the changing process.
Effective Diaper Changing Techniques
Step-by-Step Guide to Changing a Diaper
When it comes to changing a diaper, there are a few key steps that every parent should follow to ensure a clean and comfortable diaper for their baby. Here is a step-by-step guide to changing a diaper:
Preparing for the Change
Before you begin the diaper change, make sure you have everything you need on hand. This includes a clean diaper, wipes, a fresh outfit for your baby, and a trash bag or diaper pail to dispose of the dirty diaper. It’s also a good idea to have your baby’s hand sanitizer nearby to clean their hands after the diaper change.
Removing the Soiled Diaper
To remove the soiled diaper, simply unfasten the tabs and gently pull the diaper away from your baby’s body. If the diaper is particularly soiled, you may need to use a bit of lubricant, such as petroleum jelly or baby oil, to make it easier to remove.
Cleaning the Baby’s Genitals
Once the soiled diaper is removed, use a clean, damp cloth or a baby wipe to clean your baby’s genitals. Be sure to gently wash the genitals with warm water and mild soap if necessary.
Applying Fresh Diaper
Next, apply a fresh diaper to your baby. Be sure to fasten the tabs securely to keep the diaper in place.
Disposing of Soiled Diaper
Finally, dispose of the soiled diaper in a trash bag or diaper pail. Be sure to seal the bag or pail to prevent any odors from spreading.
By following these simple steps, you can ensure that your baby is always clean and comfortable, even when you’re on the go.
Common Diaper Changing Mistakes to Avoid
- Not Checking the Diaper Often Enough
One of the most common mistakes that parents make during diaper changes is not checking the diaper often enough. It is essential to check the diaper frequently, especially when the baby is younger than six months old. This is because younger babies have more frequent bowel movements and may require more frequent diaper changes. If a diaper is left on for too long, it can cause discomfort and even skin irritation for the baby. Therefore, it is important to check the diaper frequently and change it as soon as it becomes soiled.
- Rough Handling of the Baby
Another common mistake that parents make during diaper changes is rough handling of the baby. It is essential to handle the baby gently and carefully during diaper changes to avoid causing discomfort or injury. Parents should avoid jostling or shaking the baby while removing the diaper, as this can cause discomfort and may even lead to injury. Instead, parents should carefully remove the diaper by gently pulling it away from the baby’s body.
- Failing to Clean the Baby Properly
Parents should also be careful to clean the baby properly during diaper changes. This is especially important if the baby has soiled the diaper. Parents should use a soft, damp cloth to clean the baby’s genital area and avoid using soap or other harsh chemicals. Harsh chemicals can cause irritation and may even lead to a rash. Therefore, it is important to use a gentle, fragrance-free cleanser and avoid using harsh chemicals during diaper changes.
- Using the Wrong Diaper Size
Finally, using the wrong diaper size is another common mistake that parents make during diaper changes. It is important to choose the right size diaper for the baby based on their weight and height. If the diaper is too small, it can cause discomfort and may even leak. On the other hand, if the diaper is too large, it can become loose and fall off easily. Therefore, it is important to choose the right size diaper for the baby and adjust it as the baby grows.
Tips for Busy Parents
Time-Saving Strategies for Efficient Diaper Changes
As a busy parent, you want to make the most out of your time. One way to do this is by implementing time-saving strategies for efficient diaper changes. Here are some tips to help you accomplish this task quickly and efficiently:
Keeping a Supply of Clean Diapers and Wipes
Having a supply of clean diapers and wipes on hand is essential for efficient diaper changes. It saves you time and energy by eliminating the need to search for clean diapers and wipes in the middle of a diaper change. Try to keep a supply of at least 10-15 clean diapers and wipes on hand at all times. You can store them in a diaper bag or a designated area in your home.
Changing Diapers in a Designated Area
Designating a specific area for diaper changes can help you save time and prevent distractions. This area should be well-ventilated and easy to access. It can be a dedicated changing table or a flat surface on the floor. By having a designated area, you can quickly and easily access the supplies you need for a diaper change, which will save you time and energy.
Using a Diaper Bag for On-the-Go Changes
Having a diaper bag with you at all times can be a lifesaver when you’re out and about with your baby. It contains all the essentials you need for a diaper change, such as clean diapers, wipes, and a change of clothes. Having a diaper bag with you means that you don’t have to search for a restroom or ask someone to borrow supplies, which can save you time and hassle.
Overall, implementing these time-saving strategies can help you become more efficient at diaper changes. With a supply of clean diapers and wipes, a designated area for diaper changes, and a diaper bag for on-the-go changes, you can quickly and easily take care of your baby’s needs while on-the-go or at home.
Managing Diaper Changes with Multiple Children
Managing diaper changes with multiple children can be challenging, but with the right strategies, it can be made easier. Here are some tips for busy parents to help them manage diaper changes with multiple children.
Setting Up a Rotation Schedule
One way to manage diaper changes with multiple children is to set up a rotation schedule. This means assigning a specific time for each child to have their diaper changed. For example, if you have three children, you could set a schedule where each child has their diaper changed every four hours. This helps ensure that each child has an equal amount of attention and care.
To make the rotation schedule work effectively, it’s important to be consistent and stick to the schedule as much as possible. This will help your children learn the routine and make it easier for them to anticipate when their diaper will be changed.
Enlisting Help from Other Caregivers
Another way to manage diaper changes with multiple children is to enlist help from other caregivers. This could be a babysitter, grandparent, or another family member. Having another person to help with diaper changes can be a lifesaver, especially when you have multiple children to take care of.
When enlisting help from other caregivers, it’s important to communicate clearly and establish a system for who will be responsible for changing each child’s diaper. This will help ensure that everyone is on the same page and that each child’s needs are being met.
Creating a Comfortable and Calm Environment
Creating a comfortable and calm environment is crucial when managing diaper changes with multiple children. This means ensuring that the area where diaper changes take place is clean, well-lit, and free from distractions. You can also create a calm environment by using soothing music or white noise.
In addition to creating a comfortable environment, it’s important to make the diaper change process as quick and painless as possible. This can be done by having all the necessary supplies ready and by being efficient with the process. This will help reduce the stress and discomfort associated with diaper changes, making it easier for both you and your child.
Overall, managing diaper changes with multiple children requires organization, communication, and a calm environment. By implementing these tips, busy parents can make the process easier and less stressful for everyone involved.
Dealing with Diaper Emergencies
What to Do When a Diaper Leaks
Dealing with a diaper leak can be a frustrating and stressful situation for parents, but it is important to remain calm and take appropriate action to clean up the mess and change the diaper as soon as possible. Here are some steps to follow when a diaper leak occurs:
- Stay Calm and Assess the Situation: The first step is to remain calm and assess the situation. Check the baby’s diaper to determine the extent of the leak and clean up any spills or messes. If the leak is severe, you may need to remove the diaper and clothing to clean up the area.
- Clean Up the Mess: Use a clean cloth or disposable wipes to clean up the mess. If the diaper has leaked on furniture or carpets, blot the area with a clean cloth to absorb the liquid. Do not rub the area, as this can damage the fabric.
- Change the Diaper Immediately: Once the mess has been cleaned up, it is important to change the diaper immediately. Dispose of the dirty diaper and dispose of any clothes or bedding that have been soiled by the leak. Put on a clean diaper and clothes, and check the baby’s diaper frequently to prevent future leaks.
It is important to note that diaper leaks can occur for a variety of reasons, including improper diaper fastening, diaper size, and medical conditions such as diarrhea or urinary tract infections. It is important to consult with a pediatrician if you notice frequent diaper leaks or other unusual symptoms in your baby.
Addressing Diaper Rash
Diaper rash is a common issue that many parents face when changing their baby’s diaper. It is usually caused by prolonged exposure to urine and feces, which can irritate the baby’s skin. Identifying the symptoms of diaper rash, treating the rash with diaper rash cream, and preventing future outbreaks are crucial in addressing this issue.
Identifying the Symptoms
Diaper rash typically appears as a red, inflamed area on the baby’s bottom, genitals, or thighs. The skin may be sensitive to the touch, and the baby may show signs of discomfort or fussiness during diaper changes. In some cases, blisters or sores may develop on the affected area. It is essential to monitor the baby’s skin closely and seek medical attention if the rash worsens or does not improve with treatment.
Treating the Rash with Diaper Rash Cream
Diaper rash cream is an effective treatment for diaper rash. It contains ingredients that help soothe and protect the baby’s skin. When applying the cream, make sure to clean the affected area thoroughly before applying a thin layer of the cream. It is essential to avoid getting the cream in the baby’s eyes or mouth. If the rash is severe, the doctor may recommend a prescription cream or ointment.
Preventing Future Outbreaks
Preventing future outbreaks of diaper rash is crucial in ensuring the baby’s skin remains healthy. Some effective measures include:
- Changing diapers frequently, at least every two hours, to prevent prolonged exposure to urine and feces.
- Keeping the baby’s bottom dry as much as possible by using a diaper cream or ointment to prevent irritation.
- Avoiding the use of harsh soaps or wipes that can irritate the baby’s skin.
- Allowing the baby to go without a diaper for short periods, especially during bath time, to give the skin a break from the diaper.
By following these tips, parents can effectively address diaper rash and ensure their baby’s skin remains healthy and happy.
Dealing with Projectile Vomit
When a baby suddenly projects vomit, it can be a frightening experience for new parents. However, there are ways to handle this situation effectively. Here are some tips on dealing with projectile vomit during diaper changes:
- Staying Calm and Safely Cleaning Up: It is essential to remain calm during diaper emergencies, as panicking can make the situation worse. Quickly move the baby to a clean area, and make sure to wash your hands thoroughly before cleaning up the mess. Use a clean, damp cloth to gently wipe up the vomit, and discard the cloth immediately.
- Changing the Diaper Quickly: After cleaning up the mess, it is crucial to change the baby’s diaper as soon as possible. Remove the soiled diaper and clothes, and clean the baby’s skin with warm water and mild soap. Dry the baby’s skin thoroughly before putting on a fresh diaper and clothes.
- Contacting a Doctor if Necessary: If the baby is showing signs of illness, such as fever, vomiting multiple times, or refusing to eat, it is best to contact a doctor. It is essential to seek medical attention if the baby’s vomit contains blood or looks like coffee grounds.
FAQs
1. How often should I change my baby’s diaper?
It’s recommended to change your baby’s diaper every 2-3 hours, or when it becomes soiled. This helps to prevent diaper rash and keeps your baby clean and comfortable.
2. What is the best way to remove a dirty diaper?
To remove a dirty diaper, first loosen the tabs on the sides of the diaper and then lift the front of the diaper up and away from your baby’s body. Slowly slide the dirty diaper down to your baby’s ankles, and then dispose of it in the trash.
3. How do I clean my baby’s genital area during a diaper change?
To clean your baby’s genital area during a diaper change, use a soft, damp cloth or disposable wipe to gently wipe from front to back. Be sure to wash your hands before and after the diaper change to prevent the spread of bacteria.
4. What is the best way to put on a new diaper?
To put on a new diaper, lay your baby on a clean surface and place the diaper on the floor or a changing pad. Lift your baby’s legs and spread them over the top of the diaper, then fasten the tabs on the sides of the diaper. Finally, lift your baby up and bring the front of the diaper up and between your baby’s legs.
5. How can I prevent diaper rash while changing my baby’s diaper?
To prevent diaper rash while changing your baby’s diaper, be sure to clean your baby’s genital area thoroughly and pat it dry with a clean cloth before putting on a new diaper. You can also apply a barrier cream or ointment to your baby’s genital area to protect it from irritation. Additionally, giving your baby plenty of opportunities to go diaper-free and exposing their genital area to air can help prevent rash.

